Archive for the ‘Nintendo’ Category

SNES CIC switchless Mod at a USA/japanese SNES

Montag, Juni 14th, 2010

Thanks to Maximilian Rehkopf alias ikari_01 we can proudly present a new switchless Mod for the SNES.

Today I am using a japanese SNES. It works with a USA SNES too. It has the same layout.

Here you can find more information:

http://www.circuit-board.de/forum/viewtopic.php?f=21&t=1896&start=63 (german)

http://nesdev.parodius.com/bbs/viewtopic.php?p=61236#61236 (english)

The mod is using a PIC 16F630 with the following code: supercic

There are two ways to get the new CIC working.

a) with original CIC still onboard

To get the supercic working you have to lift the following pins of the original CIC.

Pin 1,2,10 and 11

b) removing the original CIC and add a 10k from Pin 8 to GND.

I will make use of way b) here:

Remove the original CIC (here you can see some pictures of a PAL SNES.
Its the same at the japanese/USA SNES.

supercic_2

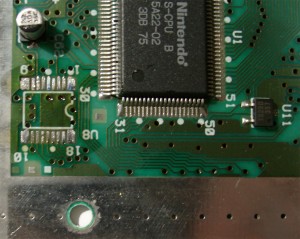
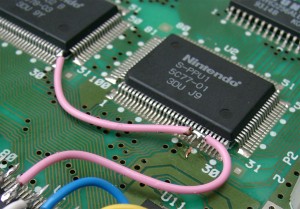
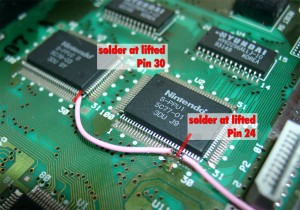
The usual 50/60Hz Pins:

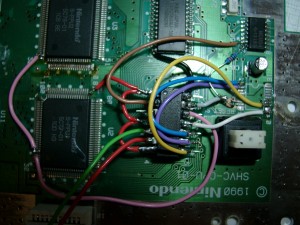
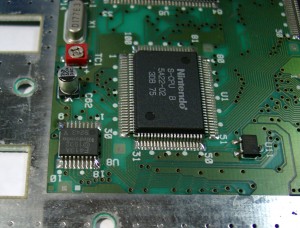
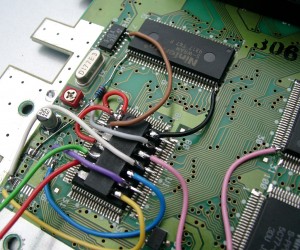
You have to lift PPU2 Pin 30 and lift PPU1 Pin 24 and wire it together to Pin 12 @Pic12f630.

The Console is set to 60Hz if you set both Pins to GND
The Console is set to 50Hz if you set both Pins to 5V

supercic_4

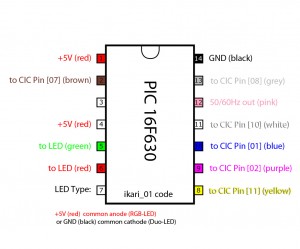
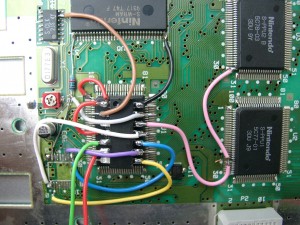
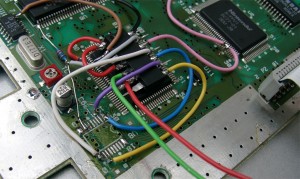
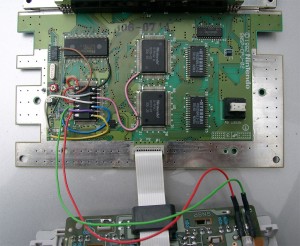
Here you can see the wiring of the pic with ikari_01 Code:

PIC_cic_pinout

First we have to put some 5V at the PIC.

You can set the PIC into 2 Modes

a) Pin 4 to 5V (I used this Mode, see the red wire)
b) Pin 4 to GND

And please set Pin 7 To 5V (PIC is set to RGB-LED Mode (common anode).
Take 5V From the Pin 81 of the nearby IC

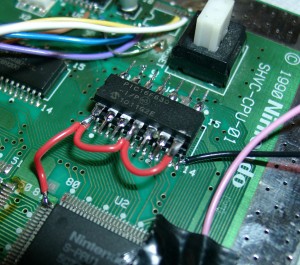
cic_jap_1

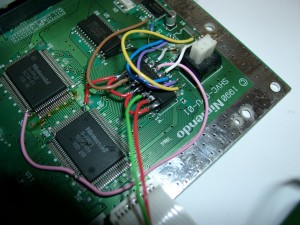
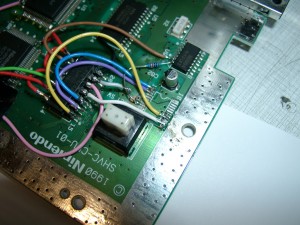
some pictures of more wiring

cic_jap_3

cic_jap_4

cic_jap_5

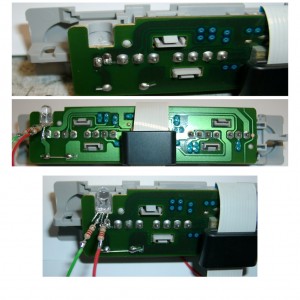
To do the LED Mod you have to remove the original LED at the controller port.
You can shortcut the original Resistor of the LED, if you want the full power of the RGB-LED ;-)
With a RGB Led you can choose 2 of the 3 colors you wish. I am using the normal colors red and green.

cic_jap_Leds

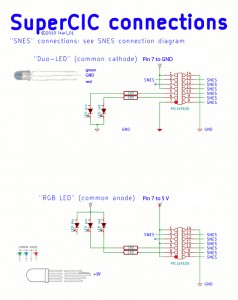
You can use two different LEDs:

a) a Duo-Led with common cathode (GND)
You have to set Pin 7 of the PIC16F630 to GND

b) a RGB-Led with common anode (plus)

Look here for a picture:

cic

Some Info about the usage of the superCIC.

You can change between 50/60Hz and Auto Function by pressing the Reset Button for longer as around 0,5 sec. The current Status is shown by the DUO-LED. (red=60Hz, green 50Hz, orange=Auto).
After releasing the Reset Button the mode will be active. The SNES will not reset at this moment.

a) 50Hz Mode is active (green)

If you insert a PAL-Game, it will start with 50Hz
If you insert a NTSC-Game, it will start with 50Hz (if Pin 4 is set GND)
If you insert a NTSC-Game, it will start with 60Hz and switches to 50Hz after 9 sec. (if Pin 4 is set 5V)
If you insert a Game without CIC, it will start with 50Hz

b) 60Hz Mode is actice (red)

If you insert a NTSC-Game, it will start with 60Hz
If you insert a PAL-Game, it will start with 60Hz (if Pin 4 is set GND)
If you insert a PAL-Game, it will start with 50Hz and switches to 60Hz after 9 sec. (if Pin 4 is set 5V)
If you insert a Game without CIC, it will start with 60Hz

c) Auto Mode is actice (orange)

starting the Game in its native frequence.

If you insert a NTSC-Game, it will start with 60Hz
If you insert a PAL-Game, it will start with 50Hz
If you insert a Game without CIC, it will start with 60Hz
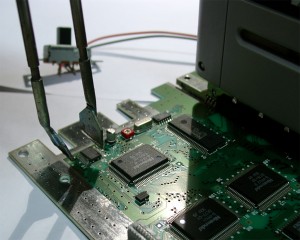
Here you can see a video, how the switching is working:

Here you can see a US-Unit with a RGB Led using blau and red part of the LED:
SuperCIC SNES switchless MOD (PAL)

Montag, Mai 10th, 2010

Thanks to Maximilian Rehkopf alias ikari_01 we can proudly present a new switchless Mod for the SNES.

I done the first modification at a PAL SNES, but it should work on US and japanese SNES too.

Here you can find more information:

http://www.circuit-board.de/forum/viewtopic.php?f=21&t=1896&start=63 (german)

http://nesdev.parodius.com/bbs/viewtopic.php?p=61236#61236 (english)

The mod is using a PIC 16F630 with the following code: supercic

Sorry the Code here is a newer version, so you have to set PIN 7 of the PIC 16F630 to GND. As here is described with a common cathode DUAL-LED!

There are two ways to get the new CIC working.

a) with original CIC still onboard

To get the supercic working you have to lift the following pins of the original CIC.

Pin 1,2,10 and 11

b) removing the original CIC and add a 10k from Pin 8 to GND.

The following pictures will show way b).

Here you can see a PAL SNES with the F413A CIC

supercic_1

Removing the CIC

supercic_2

After removing the original CIC:

supercic_3

The usual 50/60Hz Pins:

You have to lift PPU2 Pin 30 and lift PPU1 Pin 24 and wire it together to Pin 12 @Pic12f630.

The Console is set to 60Hz if you set both Pins to GND
The Console is set to 50Hz if you set both Pins to 5V

supercic_4

2nd View:

supercic_8

Here you can see the wiring of the PIC:

PIC_cic_pinout

More wiring:

You can set the PIC into 2 Modes

a) Pin 4 to 5V (I used this Mode, see the red wire)
b) Pin 4 to GND

And please set Pin 7 To GND, so the PIC is set to DUO-LED Mode (common cathode).
On the following picture the wire is missing!

supercic_5

supercic_6

supercic_7

supercic_09

you can remove the original LED by heat both pins together and pull it a little bit out.
So you can cut the 2 pins of the original LED.

After this you can use a DUO-LED (gn/red) 5mm with 220Ohm Resistors. I solder the middle (GND) to the SNES Controllerport
To play import Controller or thinks like a superscope on a PAL-SNES you can shortcut all 4 Diodes on the controller port. (see picture2)

supercic_10

You can use two different LEDs:

a) a Duo-Led with common cathode (GND)
You have to set Pin 7 of the PIC16F630 to GND

b) a RGB-Led with common anode (plus)
You have to set Pin 7 of the PIC16F630 to 5V

Look here for a picture:
cic

Some Info about the usage of the superCIC.

You can change between 50/60Hz and Auto Function by pressing the Reset Button for longer as around 0,5 sec. The current Status is shown by the DUO-LED. (red=60Hz, green 50Hz, orange=Auto).
After releasing the Reset Button the mode will be active. The SNES will not reset at this moment.

a) 50Hz Mode is active (green)

If you insert a PAL-Game, it will start with 50Hz
If you insert a NTSC-Game, it will start with 50Hz (if Pin 4 is set GND)
If you insert a NTSC-Game, it will start with 60Hz and switches to 50Hz after 9 sec. (if Pin 4 is set 5V)
If you insert a Game without CIC, it will start with 50Hz

b) 60Hz Mode is actice (red)

If you insert a NTSC-Game, it will start with 60Hz
If you insert a PAL-Game, it will start with 60Hz (if Pin 4 is set GND)
If you insert a PAL-Game, it will start with 50Hz and switches to 60Hz after 9 sec. (if Pin 4 is set 5V)
If you insert a Game without CIC, it will start with 60Hz

c) Auto Mode is actice (orange)

starting the Game in its native frequence.

If you insert a NTSC-Game, it will start with 60Hz
If you insert a PAL-Game, it will start with 50Hz
If you insert a Game without CIC, it will start with 60Hz

Here you can see a video, how the switching is working:

Here you can see a US-Unit with a RGB Led using blau and red part of the LED:
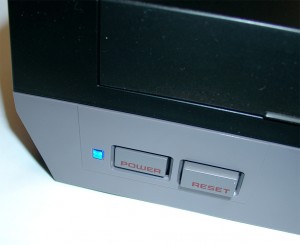
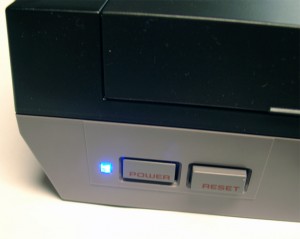
blue Power LED for NES

Mittwoch, April 28th, 2010

today I done a LED mod for a NES.
Its easy, the most difficulty is to open and remove all screws.
You must remove the mainboard to get the Power LED PCB.
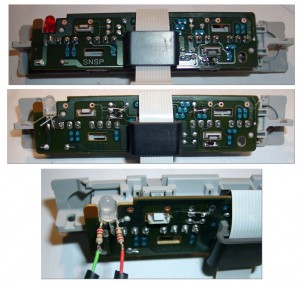
Remove the original 5mm LED and replace with a color you like.
Look here:
nes_blue_1

nes_blue_2

nes_blue_3

Virtua Boy Fixing Glitchy Displays

Dienstag, April 13th, 2010

I got a defective Virtua Boy from a customer with the Glitchy Display Error.

After a quick research i found: http://www.projectvb.com/displayfix.html

I used the Solder Method for repairing:

For removing the cable I was using a Fiber Pencil like this

and after this It was possible to resolder the pins @ 230-250Grad Celsius.

And it works, great again like the first day :-)

One little tipp: check the cable connector if its connected right at the other side.

If its inserted to much, you will get no picture from this site…

NES painting

Mittwoch, März 24th, 2010

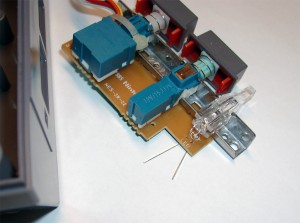
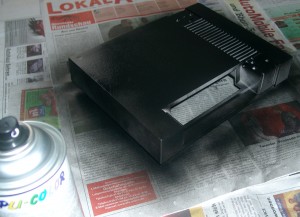
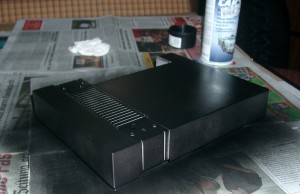
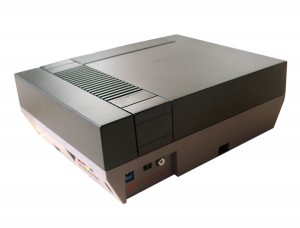
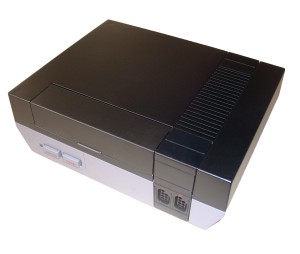
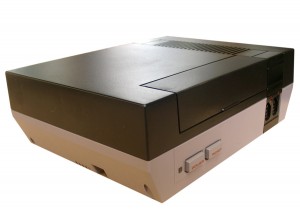
A customer asked me to do some brushing. He wants to recolor the top of his NES in black.

First you have to clean it and remove all dust from the surface.
Then find a „peacefull“ place (not windy).

And make use of a plastic primer.

Then black brush painting, take 3-4 brush events.

Look here:

nes-(5)

nes-(6)

nes-(1)

nes-(3)

nes-(7)