Archive for Februar, 2010

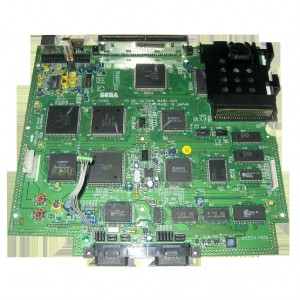
Sega Saturn switchless MOD Pal bigger mainboard

Dienstag, Februar 23rd, 2010

Inspired of the great site mmmonkey and sebs great code for the Sega Saturn, I will use the PIC 16F630 in a PAL Sega Saturn.

You are in need of a PIC 16F630 with sebs code, some wire, two resistors 220Ohm and a DUAL Led red/Green.

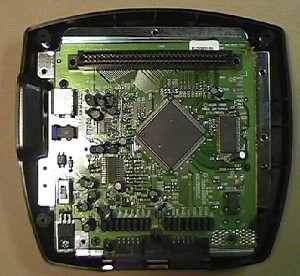
It is a PC BD SATURN MAIN VA9 Board Pal Mainboard.

If you can’t do it yourself, we can take care of your Sega Saturn

sat_1

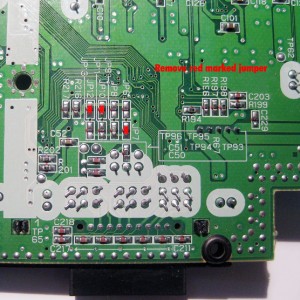
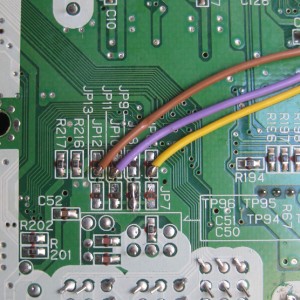
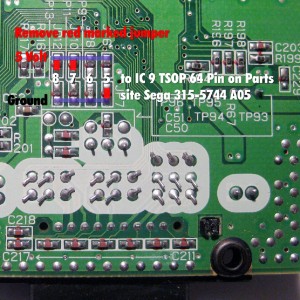
At the solder Side you will find some Jumper from JP 6 to JP 13

Remove the three marked Jumper JP7,JP10,JP12 for Language preparation

sat_3

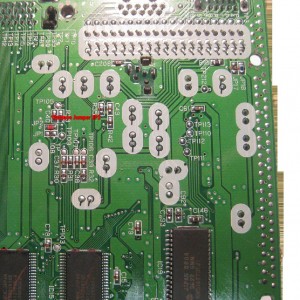
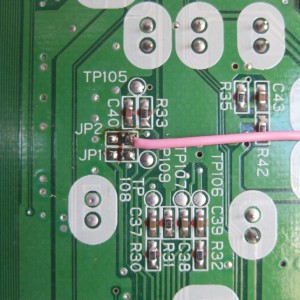
remove Jumper 2 (50Hz, 60Hz switching)

sat_4

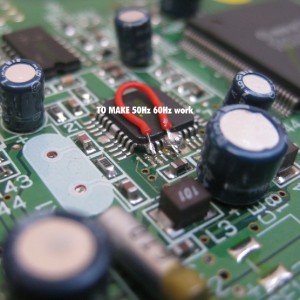
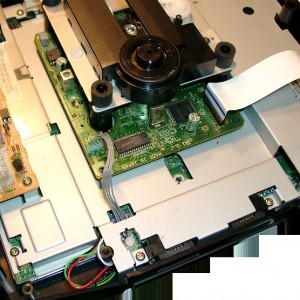
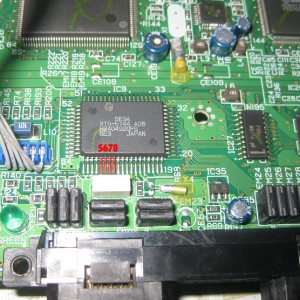
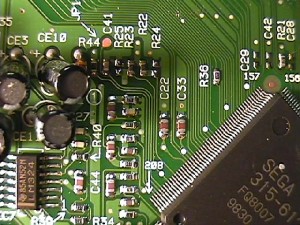
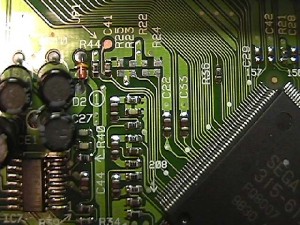
to make switching to 60Hz work, you need to desolder and pull up PIN 1 of IC20 and wire it to GND

sat_10

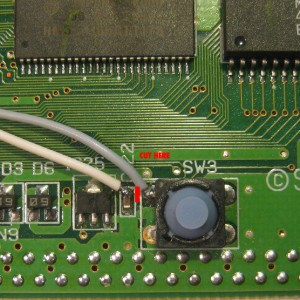
cut the following circuit path on the Parts Site at the reset switch

sat_9

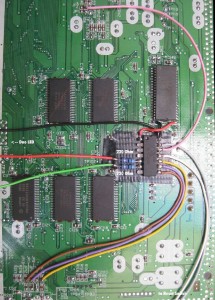
Here you can see the wiring of the PIC

sat_7

some zooming pictures

sat_5

sat_6

Here you can see the 5mm DUO Led green/red and the Reset Wiring

Use this way for the wires, so you didn’t cut some during the reassembling

sat_11

Some background Information

The Language Identifikation is working with IC9: 315-5744 A05 Pin 5 to 8

Pin 5 -> JP 6 / JP 7

Pin 6 -> JP 8 / JP 9

Pin 7 -> JP 10 / JP 11

Pin 8 -> JP 12 / JP 13

(If Jumper 6,8,10,12 is set PIN 5,6,7,8 is set to 5V)

(If Jumper 7,9,11,13 is set, PIN 5,6,7,8 is set to GND)

sat_2

sat_31

PIC Pinout / Function

Region

5 (red Led)

6 (gn Led)

Pin8 (JP12)

Pin9 (JP10)

Pin10 (JP6)

12 (VidMode)

EUR

GND

+5V

GND

+5V

+5V

GND

JAPAN

+5V

GND

+5V

GND

GND

+5V

USA

+5V

+5V

GND

+5V

GND

+5V

You can change the Modes via pressing the reset Button of the Saturn
If you press the reset button very short -> The Sega Console will do a reset

If you press the reset button around one second -> The console swaps between 50Hz and 60Hz.

If you hold the reset button for more than one second -> The console will toogle:

Led red Japan Mode (think of the red dot in the japanese flag)

Led orange USA Mode

Led green Europe Mode

The usage of the mod in a video:

http://www.youtube.com/watch?v=hf8kXiFLF6M
Sega Genesis 3 Pinout for 50/60Hz and Language

Donnerstag, Februar 18th, 2010

I found some pictures from the year 2000, where I modded a Genesis 3 VideoGame.

Here you can see the pictures of the Genesis 3

genesis3design

After opening

genesis3komplettpcb

here you can see the Sega IC 315-6123

genesis3segaic

here you can see the „default“ US jumper settings

genesis3jumperusaconfig

After removing the jumpers:

genesis3jumper

Technical Infos:

Pin 197: (USA/JAPAN)

If you shortcut R22 = 5V to Pin 197 -> Europe-/US-Mode
If you shortcut R24 = GND to Pin 197 -> Japan-Mode

Pin 200: (50/60Hz)

If you shortcut R25 = GND to Pin 200 -> 50Hz
If you shortcut R22 = 5V to Pin 200 -> 60Hz

Have FUN!

I will do a switchless MOD, if I get the next Genesis 3 for Modding

Sega Mega Drive 2 Switchless MOD

Donnerstag, Februar 18th, 2010

Inspired of the great site mmmonkey and sebs great code for the Sega Saturn, I will use the PIC 16F630 in a Sega Mega Drive 2 /Genesis 2.

You are in need of a PIC 16F630 with sebs code, some wire, two resistors 220Ohm and a DUAL Led red/Green.

If you can’t do it yourself, we can take care of your Mega Drive 2 / Genesis 2

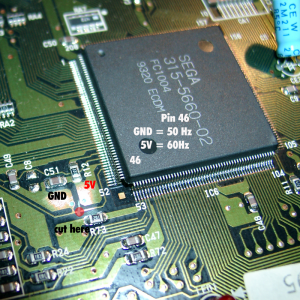
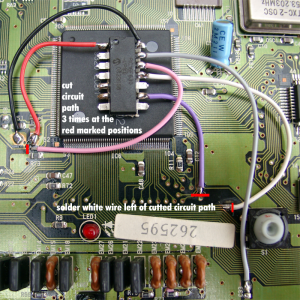
At the Mainboard you have to cut 3 circuit board tracks.

Cut the fist circuit path from pin 46 and solder the pink wire at the right site of the cut.

Pin 46 at the SMD2 works for 50/60Hz switching. GND= 50Hz and 5V = 60Hz

smd2_switchless_cut_50,60hz

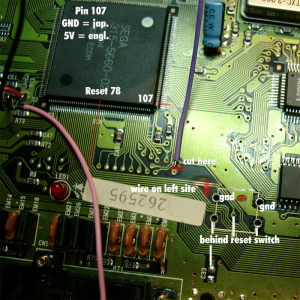
Cut the second cirquit path to Pin 107 at the marked place and solder the purple wire on the upper Side.

Pin 107 selecting japanese Mode (GND) or english Mode (5V).

GND at Pin 78 will Reset the Sega Console.

So you have to cut the 3rd cirquit path to Pin 78, see marked place and solder a white wire to the left site of the cutted path.

smd2_switchless_cut_jap,engl,-reset

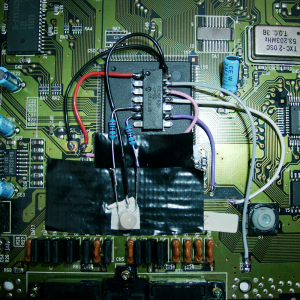
Here you can see the complete wiring including PIC

Pin 01 Red (5V)

Pin 05 Resistor 220Ohm -> red site of the LED

Pin 05 Resistor 220Ohm -> green site of the LED

Pin 09 purple (jap./engl switching)

Pin 11 white (Reset Signal of the SMD)

Pin 12 pink (50/60Hz switching)

Pin 13 grey (Button Signal)

Pin 14 black (GND)

smd2_switchless_pic

Now you have to remove LED1 and replace it with the Duo LED 5mm

smd2_switchless_pic_led

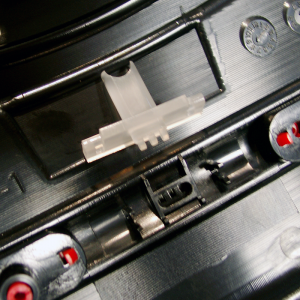
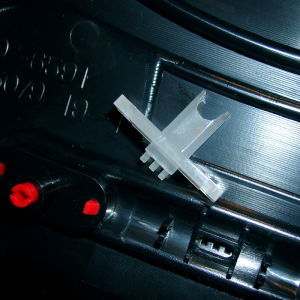
After this you have to do some mechanics. Rasp the white pvc until the 5mm LED is fitting.

cover_1

cover_2

Have Fun

Usage of Sebs CODE:

You can change the Modes via pressing the reset Button of the SMD2.
If you press the reset button very short -> The Sega Console will do a reset

If you press the reset button around one second -> The console swaps between 50Hz and 60Hz.

If you hold the reset button for more than one second -> The console will toogle:

Led red Japan Mode (think of the red dot in the japanese flag)

Led orange USA Mode

Led green Europe Mode

Here you can see a little video, how to use the switchless mod.

Sorry for my english, its my first public english speaking ;-)

http://www.youtube.com/watch?v=8N3OnxkShcQ