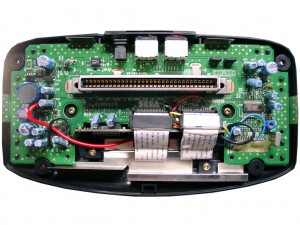
NeoGeo AES switchless MOD

April 20th, 2010

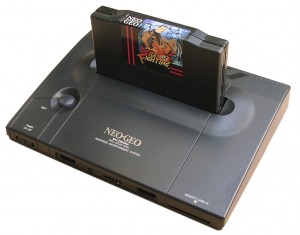
I am using a NEOGEO AES3-5 unit for the switchless mod today

neogeo

Rom Part: piggyback

I added a second Bios from Razoola the UNIBIOS. You can get it at www.wolfsoft.de or unibios.free.fr

Here you can find a good tutorial for piggyback the UNIBIOS http://www.mmmonkey.co.uk/

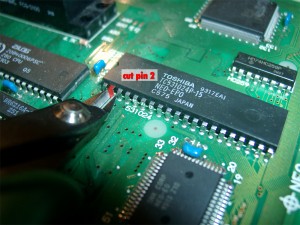
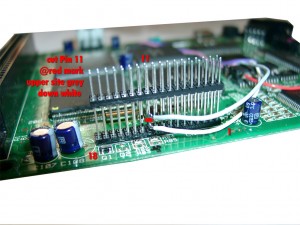
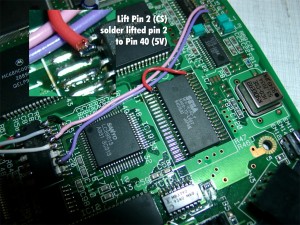
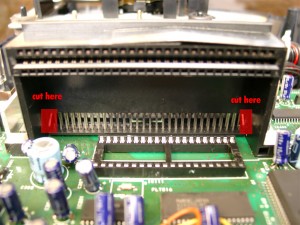
First you have cut pin 2 of the onboard Bio and lift the pin up:

neogeo_duo_1

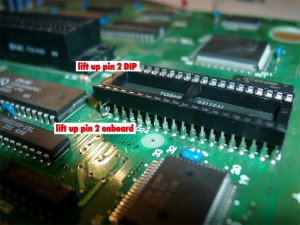
use a DIP 40 socket to make a future replacement easier

Lift up pin 2 of the mainboard and pin 2 of the DIP-socket

neogeo_duo_2

The PIC 16F630 Part

As usually I am using the switchless mod from seb http://seb.riot.org/saturnmod/

And the inspiration from Pete Grimes Site: http://www.mmmonkey.co.uk/

This time I can’t use sebs pic code „out of the box“.
I have done some lite modifications to the code.
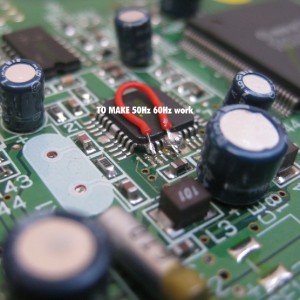
50/60Hz switching is inverted at the NeoGeo and NeoGeo can’t switch between 50/60 Hz during operation. So it is needed to do a reset after switching 50/60Hz.

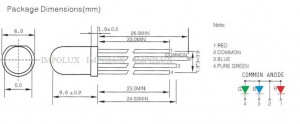
The Country Mode must reduced from 3 to 2 and I have done some slight changes for make a RGB-LED working. The difference at the RGB-LED it is wired common Anode

You will find the source code here.

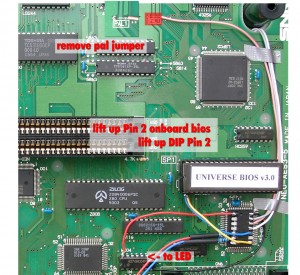
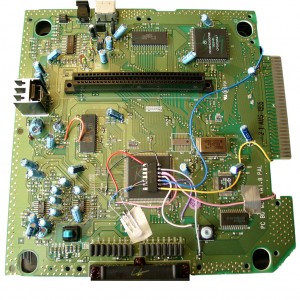
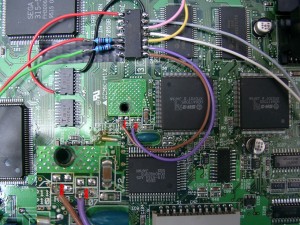
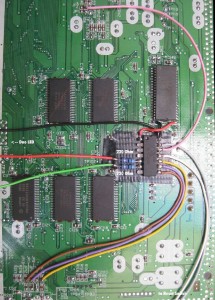
PIC 16F630 Wiring

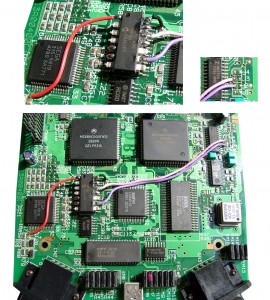
red wire PIC Pin 1 (5V) taken from IC HC04 Pin 14

black wire PIC Pin 14 (GND) taken from IC HC04 Pin 7

red wire PIC Pin 5 to RGB-LED (Resistor 150Ohm)

blue wire PIC Pin 6 to RGB-LED (Resistor 150Ohm)

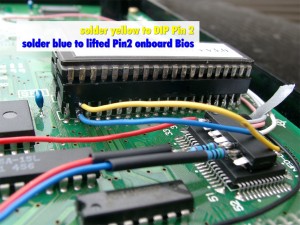
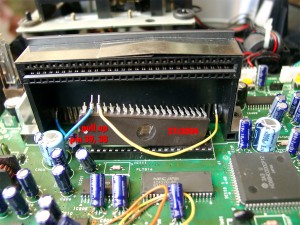
yellow wire PIC Pin 8 to lifted Pin 2 of the DIP-socket

blue wire PIC Pin 10 to lifted Pin 2 of the onboard Bios

white wire PIC Pin 11 to solder site of mainboard (Reset Signal)

pink wire PIC Pin 12 to PAL Jumper right site (LSPC2-A2 TSOP Pin 64)

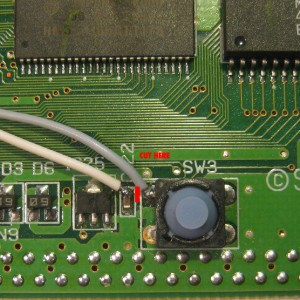
grey wire PIC Pin 13 to solder site of mainboard (Reset Button)

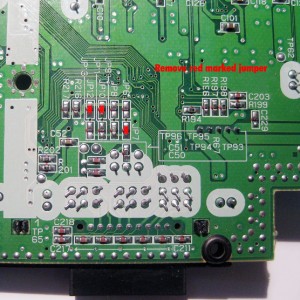
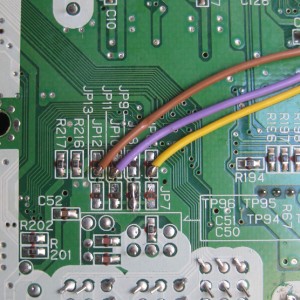
remove the pal jumper, solder pink to the right site of the jumper

(left site of PAL1 5V, right site to LSPC2-A2 TSOP Pin 64 for 50/60Hz definition)

neogeo_duo_4

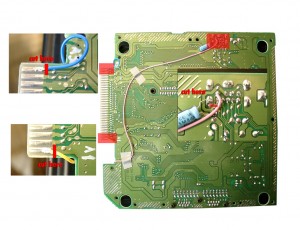
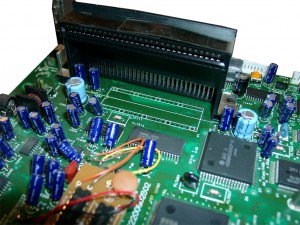
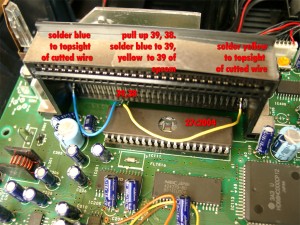
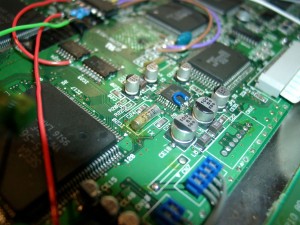
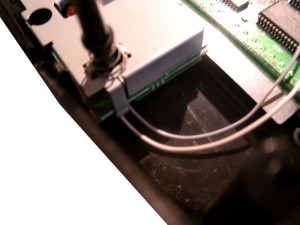
Here you can see the lifted pins

neogeo_duo_5

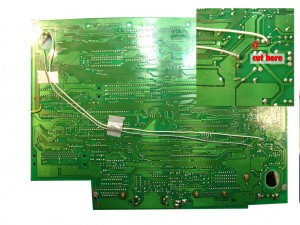
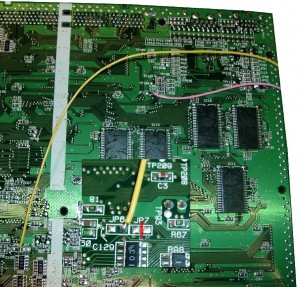
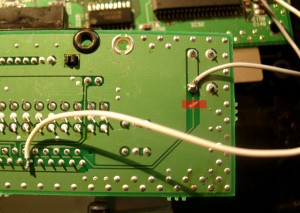
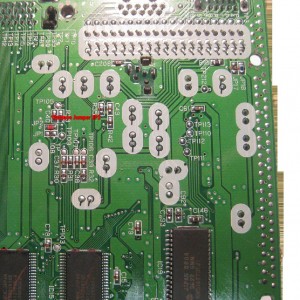
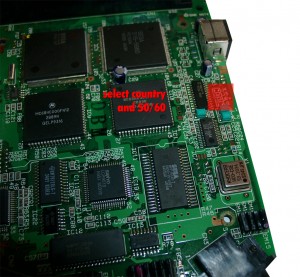
on the solder site you have to cut one circuit (see red marked area) and solder grey and white

(to split the original Reset Button Signal and make use of the Reset Button via the PIC)

neogeo5

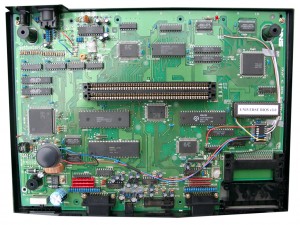
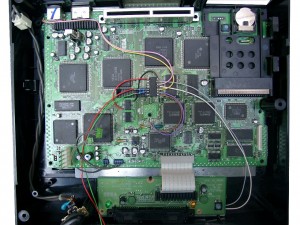
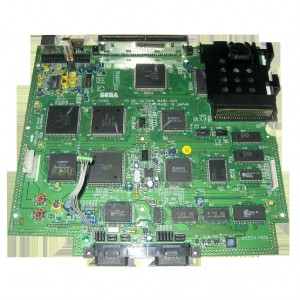
complete mainboard top site
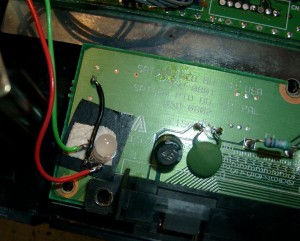
The black wire at the RGB-Led under the Reset Buttons is carrying 5V and taken from a nearby IC

neogeo_duo_6

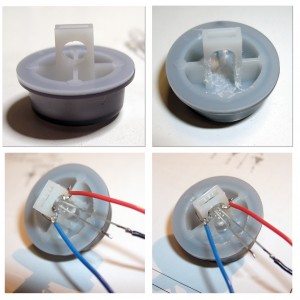
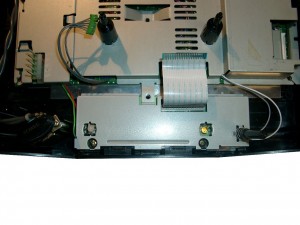
Now you have to add the RGB Led to the power switch, with help of a dremel.

I done it the same way as pete from www.mmmonkey.co.uk

For more power I am using now a RGB-Led with black wire common Anode 5V

neogeo_duo_3

rgb-led

english video

german Video
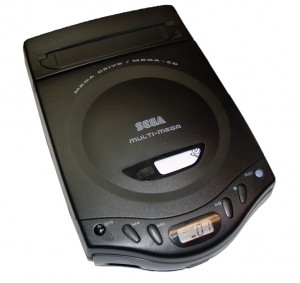
Worldwide First Sega CD-X, REAL multi-mega switchless mod

April 16th, 2010

This mod has been a long time in my head and I am happy to make it become real now :-)

The Sega CD-X is a little great unit, you can take with you as a CD-Walkman and it includes a complete Sega Genesis and a Sega CD in one unit.

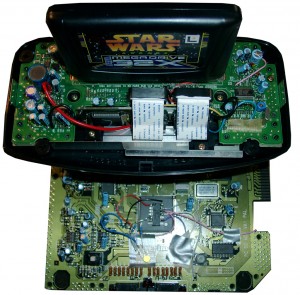
After done the previous modding of Genesis 2 in combination with Sega CD 2 and 32X I done the same for this little beauty.

We can offer you the complete modding, at our website: www.wolfsoft.de

mm1

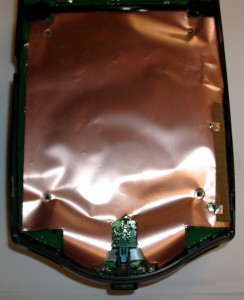
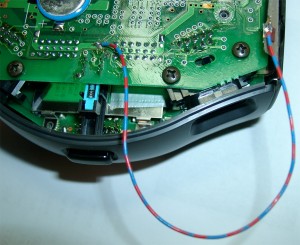
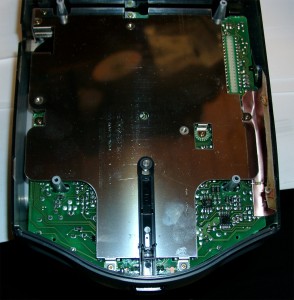
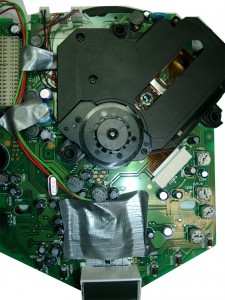
The shielding carries GND for the Mainboard. It will not work without it. For testing you can use a wire like the following pictures:

mm2

The battery have to be replaced its a solder Version of ML 2016 (3V) Li-AL Rechargeable Batterie.
Modell: ML2016-LF (Maxell)

http://datasheet.octopart.com/ML-2016-T25-Maxell-datasheet-558430.pdf

mm17

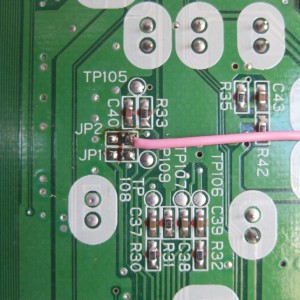
After removing the shielding you can find the jumper for 50/60Hz and the Country Settings

The default for a europe unit JP3 is set and JP2. You will have to remove any jumper you will find

at JP1, JP2, JP3, JP4.

mm3

Some more Info about the Jumper Area:

The circuits are going straight to the big SEGA 315-5660 IC

Pin 46 at Sega 315-5560 -> 50/60Hz switching. GND= 50Hz and 5V = 60Hz (JP3, JP4)

Pin 107 at Sega 315-5560 -> Country settings. GND= jap. and 5V = engl. (JP1, JP2)

Now its time to make use of a PIC 16F630 with sebs Code.

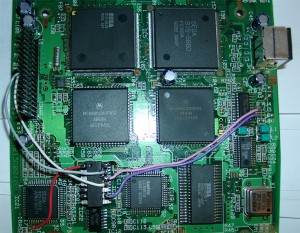
red wire 5V, black wire GND, pink wire 50/60Hz, purple wire country setting

mm4

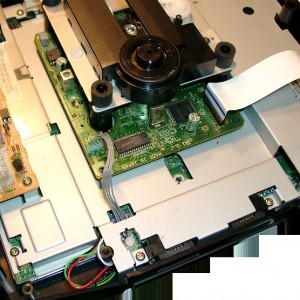
Now we have to take the 2nd Mainboard (CD-Area). We have to mod the Display with two Duo Leds. First you have to remove the shielding.

mm5

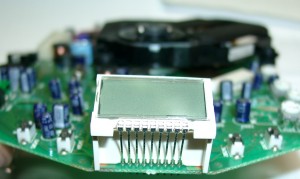
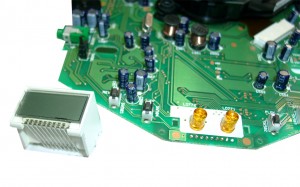
Desolder the Display Unit.

mm6

mm7

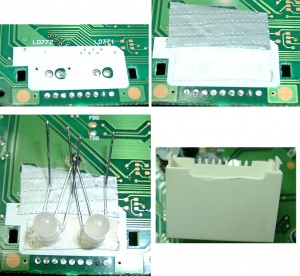
  • Remove the two original LEDs.
  • Use some tape and double sided adhesive tape
  • The Center of the 3 pins of the DUO-LED is GND. Solder both to the GND Area of the mainbord
    (I used some fiberglas pencil)
  • make space for the legs of the LED at the PVC of the Disyplay

mm8

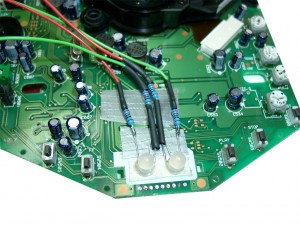
use four 220Ohm resistors and head shrink tube to avoide short curcuit.

mm9

Here you can see the routing of the 4 wires bounded with some tape.

mm10

Now it is time to get the „power“ over the reset button. It is placed on the CD-Mainboard. Lucky the Signal is going through the 36 Pin Connector on the left site.

mm11

You will have to cut pin 11 at the outersite of the connector.

PIC Pin 13 grey is connected to the upper site. Its for the Reset switch

PIC Pin 11 white is connected to the lower site (Reset Sega 315-5660 IC Pin 78)

mm12

Rom Part – for playing Cds around the world

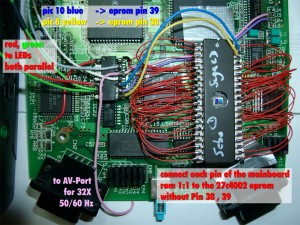
You are in need of a Eprom (27c2004) and burn all 3 bios Version into it. The usa, japanese and pal Version. You can select the different Bios Version via A16 (Pin 38) and A17 (Pin 39) of the Eprom.
The order is: USA-> JPN -> EUR.

You can do it by yourself. Take the CD-Bios Versions and make a byteswap each of them.

The concat the 3 Files via Windows Commandline copy

copy /B usa.bin + pal.bin + jpn.bin switchless.bin

The final goal is to get 2 wires from the 16F630 PIC to the Eprom.
Here we make use of 2 wires from the Sega Expansionport.

PIC 8 /Eprom 38

PIC 10 /Eprom 39

EUR

0

1

JPN

1

0

USA

0

0

First you have to disable to onboard bios. Desolder PIN 2 (CS) of the onboard ROM and lift the pin up. Solder a red wire from the lifted Pin 2 of the ROM to Pin 40 (5V) of the ROM.

mm13

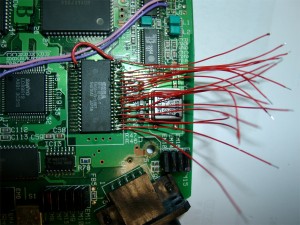
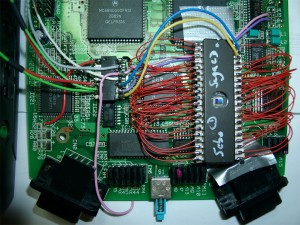
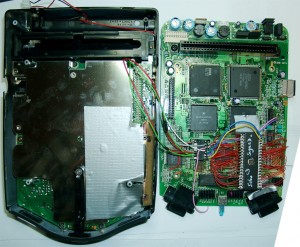
Now its time to prepare 38 wires each 5-6 cm and do some soldering ;-)

mm14

Wire blue and yellow as you see on the picture. This to wires will do the Bios selection:

mm19

red and green coming from the 5mm Duo-Leds. Solder both parallel to PIN 5,6 of the PIC

mm20

Adding Sega 32X Support (optional)

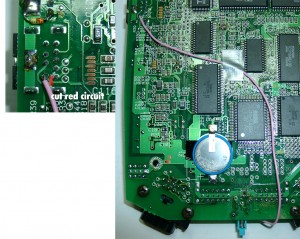
The pink wire to the AV-Port is optional, only necassary for 32X support

You will have to cut the red marked circuit and solder a pink wire to Pin 6 of the AV Port

We will disable the Mono-Audio for this function. This will not be a problem, because STEREO-Audio is still working. (Who needs mono ?)

On the right picture you can see the right routing for the wire:

mm18

To prevent short circuits use tape on the left site of the CD-X.
Here you can see the routing of the LED wires.

Make sure no red/green wire is nearby or inbetween of the 36 PIN connector between the two mainboards:

mm21

german:

you can see the different colors:

http://www.youtube.com/watch?v=gaQCTsi3c6c

Rare Quadro Magnum Project

April 13th, 2010

Hi Folks,

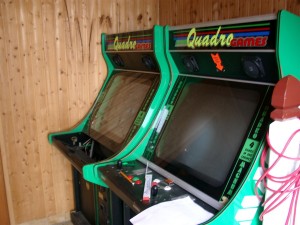
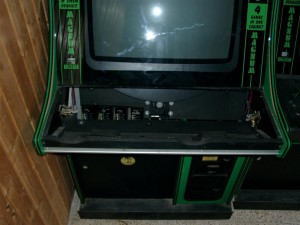
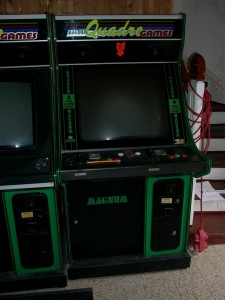
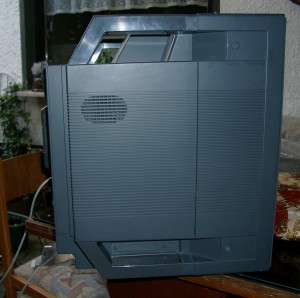
after polish the good old Jumbo Quadro Games Cabinet, I found a bigger one a rare cabinet called: Quadro Magnum.

There are different advantages over the Jumbo Cabinet:

a) I can use a digital Multisync CRT-Monitor like the Wells-Gardner 27 Zoll instead of the analog 25 Zoll Multisync CRTs

b) the controlpanel is really big, so I can make use of more toys :-)

c) its a sitdown

d) a negative point is the width is around 83cm and a lot of door are only 80 cm :-(

e) turns the screen like all Quadros via motor ;-)

It will take some time to finish this project, because its for me and I have a lot other work to do at the moment.

Here the first pictures:

magnum (1) (Large)

magnum (6) (Large)

magnum (11) (Large)

what have I done until now:

a) orderd new glasses for marquee an bezel

b) asked the panelmaker willi for a new CP

to do:

a) what is needed on this big controlpanel

1-2 trackball,

1-2 spiner, or crazy 4 spiner for games like warlords…

2-4 sticks?

analog stick?

a lot of buttons

Retroarcade lifting

April 13th, 2010

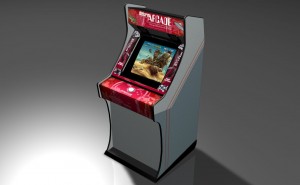
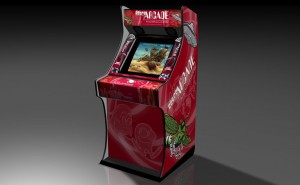
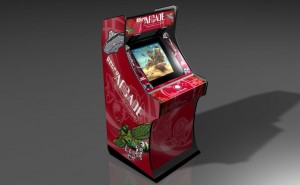
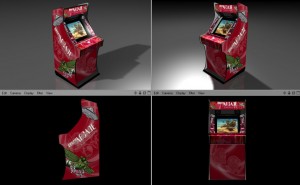
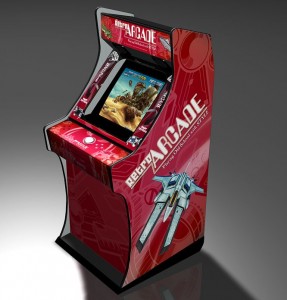
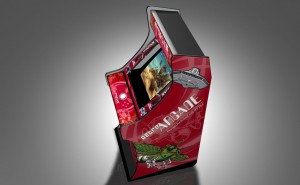
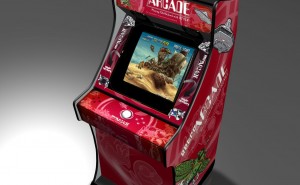
Thank to Alex from cologne, I got a Cinema4D Object of the Quadro Games Jumbo Arcade Cabinet. And it was time play with it,  to show whats possible to make.

Here you can see the old look:

retroArcade_Cabinet_quadro_look_1

Here some tests:

retroArcade_Cabinet_01

retroArcade_Cabinet_02

retroArcade_Cabinet_03

retroArcade_Cabinet_04

retroArcade_Cabinet_05

space_look

Virtua Boy Fixing Glitchy Displays

April 13th, 2010

I got a defective Virtua Boy from a customer with the Glitchy Display Error.

After a quick research i found: http://www.projectvb.com/displayfix.html

I used the Solder Method for repairing:

For removing the cable I was using a Fiber Pencil like this

and after this It was possible to resolder the pins @ 230-250Grad Celsius.

And it works, great again like the first day :-)

One little tipp: check the cable connector if its connected right at the other side.

If its inserted to much, you will get no picture from this site…

Repair of a dead NEC Multisync 2950G

April 13th, 2010

We got some NEC Multisync Monitors. One of the greates Multisync Monitor for ArcadeGaming via PC and Mame to play the oldshool games in their native Resolutions.

But after some hours of playing, one of the Monitors didn’t power up anymore :-(.

I got the service manual you can download it here: XM2950G Service Manual.

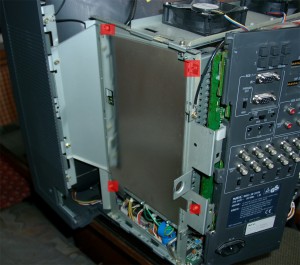
And have to open the Monitor:

On The right site you see 2 big screws. One more you will find on the Top Side near  the Screen

nec_1

remove the red marked screws

nec_2

remove the plastic on the backsite and the plastic case

On the left site you will find the power supply.

nec_3

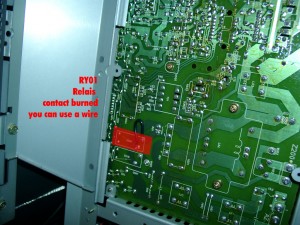
After some checking I found one of the 230V Relais was broken.

A quickrepair was to shortcut the contact.

After this the Monitors works again.

nec_4

Have fun

Sega Genesis 2 ultimative switchless mod

April 8th, 2010

Inspired from petes fabulous site www.mmmonkey.co.uk and his switchless mods,

I want to make the ultimative Sega Genesis 2 switchless MOD including 32X and Sega CD2.

In the beginning we have to mod the Genesis 2 with the switchless mod, like I done before.

(Thanks to SEB for the great PIC Code).

Difference between standard Sega Genesis switchless mod

For making a 32X working you are in need of the pink wire. This signal is needed in the 32X.

We can make use of the A/V connector cable between the Genesis 2 and the 32X. The Mono Audio Signal is not in use, so we can cut the original Mono signal at the Genesis 2 A/V connector and the 32X A/V connector.

Here you will see the Sega Genesis 2 switchlees mod including the 3 more wires (yellow, blue, and pink).

The Pink is needed for the 32x.

Blue and yellow is needed if you want to make a Sega CD working too.

For 32X support add a 2nd pink wire to Pin 12 of the PIC.

smd2_1

At the solder site you have to cut the cirquit path to Pin 6 of the A/V Port and solder the pink wire to Pin 6 of the A/V Port.

For Sega CD support you have to cut Pin A01 (yellow wire) and Pin A30 (blue wire) of the Genesis Expansionsport and solder the 2 wires to the PIC Pin 10 blue and PIC Pin 8 yellow.

Backsite of the Genesis 2:

smd2_2

Adding 32X support

First you have to open the 32X and remove the shielding.
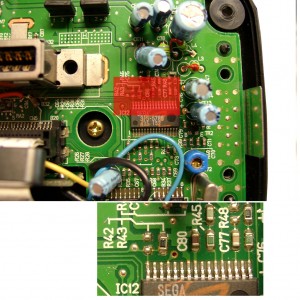
The only protection of the 32X is the 50/60Hz settings. You will find it at the right site of the mainboard IC12 SEGA 315-5788.

32_x_1

You will find R43, if its a PAL 32X (Pin 32 to GND) -> 50Hz
You will find R42, if its a NTSC 32X (Pin 32 to 5V) -> 60Hz

Remove the Resistor

32_x_2

Sega Genesis 2 A/V Pinout

Pin

Description

1

Blue

2

+5V DC

3

Green

4

Composite Video
5

Sync

6

Audio Mono

7

Red

8

Audio Stereo L

9

Audio Stereo R

minidinspec9f

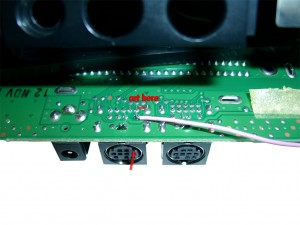
On the solder site you will have to Cut the cirquit path to Pin 6 of the A/V Port.

32_x_3

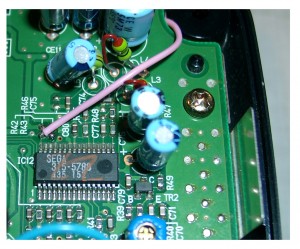
Solder one pink wire from AV Out Pin 6 (solder Site) to Pin 32 of IC12 (component site)

32_x_4

32_x_5

Adding Sega CD 2 support

You are in need of a Eprom (27c2004) and burn all 3 bios Version into it. The usa, japanese and pal Version. You can select the different Bios Version via A16 (Pin 38) and A17 (Pin 39) of the Eprom.
The order is: USA-> JPN -> EUR.

You can do it by yourself. Take the CD-Bios Versions and make a byteswap each of them.

The concat the 3 Files via Windows Commandline copy

copy /B usa.bin + pal.bin + jpn.bin switchless.bin

The final goal is to get 2 wires from the 16F630 PIC to the Eprom.
Here we make use of 2 wires from the Sega Expansionport.

Pin8 yellow 16F630->Exp Port Pin A01@Genesis 2->Exp. Port Pin A30@SegaCD2->Pin 38Eprom

Pin 10 blue 16F630->Exp Port Pin A30@Genesis 2->Exp. Port Pin A30@SegaCD2->Pin 39Eprom

Pin A01 and A30 of the Expansionsport carrying GND. There are many ground Signals at the Expansionsport. So we can cut these two of and make use of the free Pins for the Bios select.

PIC 8 /Eprom 38

PIC 10 /Eprom 39

EUR

0

1

JPN

1

0

USA

0

0

First you have to remove the original Bios:

segacd_1

cut the 2 wires left and right (A30, A01)

segacd_2

You will have to pullup Pin 38 and Pin 39 of the Eprom and wire blue and yellow like the following picture

segacd_3

Here you can see the complete eprom attached

segacd_4

Look here for a video showing how the modification is working (german language)
http://www.youtube.com/watch?v=PYxM5u4DBis

english

http://www.youtube.com/watch?v=eQVGKSsld1k

NES painting

März 24th, 2010

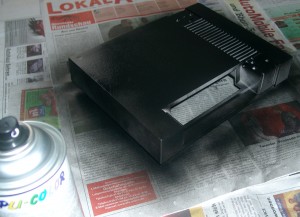
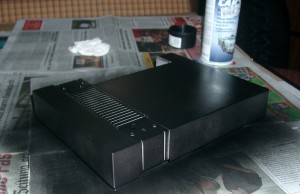
A customer asked me to do some brushing. He wants to recolor the top of his NES in black.
First you have to clean it and remove all dust from the surface.
Then find a „peacefull“ place (not windy).

And make use of a plastic primer.

Then black brush painting, take 3-4 brush events.

Look here:

nes-(5)

nes-(6)

nes-(1)

nes-(3)

nes-(7)

Sega Saturn switchless MOD Pal smaller mainbaord

März 15th, 2010

My second german Saturn for switchless MOD was not the same as the first one.

This one got 2 PCBs inside. A smaller Main PCB and a separate Controller Port PCB.

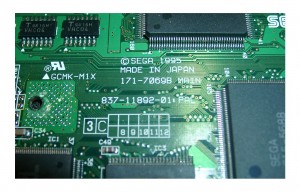
The Mainboard is called: 837-11892-01 PAL.

layout_0_1

layout_1

Here you can find the Mainboard Revision on the TOP Side of the Board

layout_2

For correct working of the 50/60Hz you have to desolder Pin 1 and pull up pin 1 of IC20.

Then wire it to GND.

layout_4

Backsite Mainboard.You need to cut the jumper at JP7 (remove the circuit)

layout_3

Frontsite of the Mainboard (LED Resistors 220Ohm) PIC 16F630 cut the two red marked circuit pathes between JP12 and JP 10

layout_5

Separate Controller PCB (cut the red marked circuit)

wire colors (upper site grey at the RESET Button, downsite white)

layout_6

DUO-LED soldering an position at the separate Controller PCB

layout_7

Some more pictures

layout_8

layout_10

layout_9

Sega Saturn switchless MOD Pal bigger mainboard

Februar 23rd, 2010

Inspired of the great site mmmonkey and sebs great code for the Sega Saturn, I will use the PIC 16F630 in a PAL Sega Saturn.

You are in need of a PIC 16F630 with sebs code, some wire, two resistors 220Ohm and a DUAL Led red/Green.

It is a PC BD SATURN MAIN VA9 Board Pal Mainboard.

If you can’t do it yourself, we can take care of your Sega Saturn

sat_1

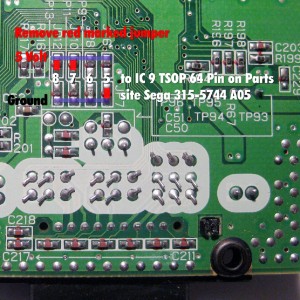
At the solder Side you will find some Jumper from JP 6 to JP 13

Remove the three marked Jumper JP7,JP10,JP12 for Language preparation

sat_3

remove Jumper 2 (50Hz, 60Hz switching)

sat_4

to make switching to 60Hz work, you need to desolder and pull up PIN 1 of IC20 and wire it to GND

sat_10

cut the following circuit path on the Parts Site at the reset switch

sat_9

Here you can see the wiring of the PIC

sat_7

some zooming pictures

sat_5

sat_6

Here you can see the 5mm DUO Led green/red and the Reset Wiring

Use this way for the wires, so you didn’t cut some during the reassembling

sat_11

Some background Information

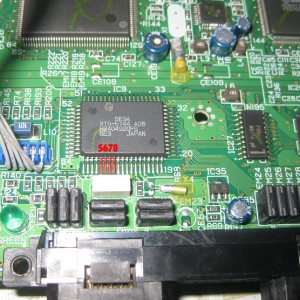
The Language Identifikation is working with IC9: 315-5744 A05 Pin 5 to 8

Pin 5 -> JP 6 / JP 7

Pin 6 -> JP 8 / JP 9

Pin 7 -> JP 10 / JP 11

Pin 8 -> JP 12 / JP 13

(If Jumper 6,8,10,12 is set PIN 5,6,7,8 is set to 5V)

(If Jumper 7,9,11,13 is set, PIN 5,6,7,8 is set to GND)

sat_2

sat_31

PIC Pinout / Function

Region

5 (red Led)

6 (gn Led)

Pin8 (JP12)

Pin9 (JP10)

Pin10 (JP6)

12 (VidMode)

EUR

GND

+5V

GND

+5V

+5V

GND

JAPAN

+5V

GND

+5V

GND

GND

+5V

USA

+5V

+5V

GND

+5V

GND

+5V

You can change the Modes via pressing the reset Button of the Saturn
If you press the reset button very short -> The Sega Console will do a reset

If you press the reset button around one second -> The console swaps between 50Hz and 60Hz.

If you hold the reset button for more than one second -> The console will toogle:

Led red Japan Mode (think of the red dot in the japanese flag)

Led orange USA Mode

Led green Europe Mode

The usage of the mod in a video:

http://www.youtube.com/watch?v=hf8kXiFLF6M